






Introduction to Digital Documentation
Digital documentation has evolved from mere typing to the creation of highly impactful documents professionally. For this module, our emphasis will be on industry-standard applications such as LibreOffice Writer and OpenOffice Writer. These applications are practically identical, meaning that all the competencies you learn here are widely transferable.
In my capacity as your Technical Educator, it is my objective to make sure that you are able to attain the elusive 100/100 mark. For this to happen, you cannot only know which buttons to press but also the logic behind their functionality.
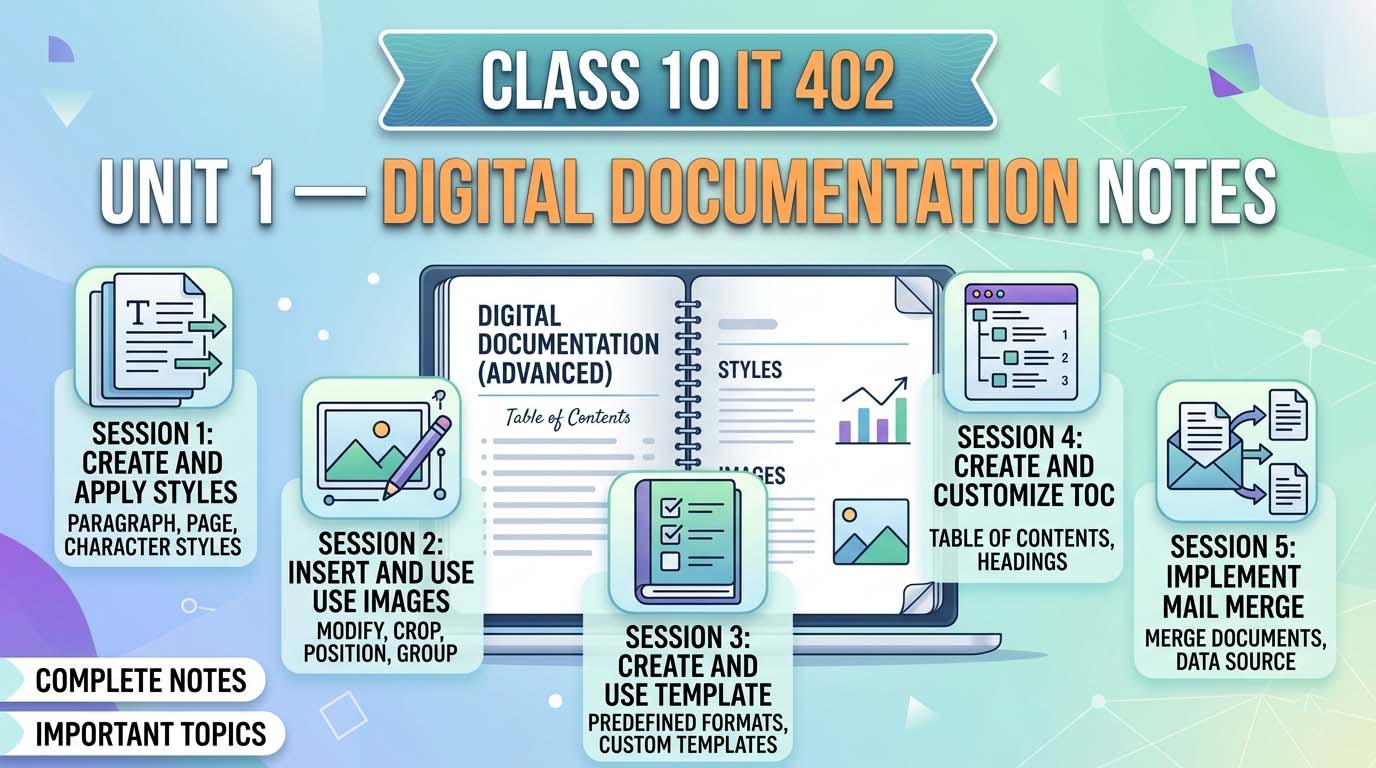
2. Chapter 1: Applying Styles in a Document
2.1 Style Knowledge
A style is a series of pre-defined formatting options, such as font size, color, and alignment, which can be applied to items like text, tables, or frames with one click.
Advantages of Styles:
- Time Saving and Convenience: Apply a series of formats within a few seconds.
- Consistency: Retains consistency in a document that may span 50 pages.
- Efficiency: Modify one instance of the style; all others will be modified accordingly.
2.2 Styles Categories
In LibreOffice Writer, there are six main types of styles to be used. Knowledge of them is key to success during the exam:
- Paragraph Style: The Default Style. Responsible for alignment, tab stops, and line spacing of full paragraphs.
- Character Style: Impacts individual characters or words within a paragraph.
- Frame Style: Applied to graphics and text frames.
- Page Style: Specifies how pages look, including margins, headers, footers, and sizes.
- List Style: Responsible for the design of bulleted or numbered lists.
- Table Style: Predesigned layouts for tables’ borders and shading.
2.3 Application of Styles
Method 1: Styles and Formatting Tab
- Highlight the required text or place the cursor within the paragraph.
- Open the Styles and Formatting Pane using the F11 key.
- Choose the required category such as Paragraph Styles and click the style name twice.
Method 2: Fill Format Mode (Magic Brush)
- This is the fastest method to use style for many separate sections.
- Use F11 to open the Styles pane.
- Choose the style that you need.
- Click on the Fill Format Mode button (looks like a brush).
- Apply the style to different parts by clicking on them.
- To stop, use the Esc key.
[BOARD EXAM SCENARIO]
Question: Sneha has a total of 20 different heading styles that appear randomly on her 30-page document. Sneha needs to apply “Heading 1” style to all those headings quickly. What is the right tool for Sneha? Answer: The answer to the question is the “Fill Format Mode” – also called the “Magic Tool.”
2.4 Creation and Modification of Styles
- Selection-Based Approach: Manually format some text, then use the New Style from Selection button on the Styles tab.
- Drag and Drop Approach: Select the manually formatted text, then drag it into the Styles tab for naming and saving.
- Modification of a Style: In order to change an existing style, you will need to format a paragraph that uses the style, then click the Update Selected Style button, which is accessed via the drop-down menu beside the New Style from Selection button.
- Styles Loading: In order to load styles from templates or other documents, click the drop-down menu beside the New Style from Selection button and select Load Styles.
3. Chapter 2: Inserting and Formatting Graphics
3.1 Use of Graphics
The graphics are used for creating visual effect, grabbing the reader’s attention, and helping in understanding of difficult material.
3.2 Adding Pictures
- The five basic ways for adding pictures are as follows:
- Using File: Insert -> Picture and browse the file saved on your computer.
- Dragging and Dropping: Dragging the picture to the Writer screen.
- Using Scanner: Insert -> Media -> Scan requires a scanner connection.
- Using Clipboard: Copying a picture using Ctrl+C and pasting it with Ctrl+V.
- Using Gallery: Insert -> Media -> Gallery utilizes the pictures available in LibreOffice library.
3.3 Modifying Images
If an image is chosen, the Image Toolbar will pop up, providing:
- Graphics Mode: Alter Graphics Mode into Grayscale, Black/White or Watermark.
- Flip: Flip image either Vertically or Horizontally.
- Transparency: Modify transparency percentage to make image into watermark.
| Filter Name | Effect |
| Invert | Reverses the color values of the image. |
| Smooth/Sharpen | Softens the image or increases the contrast/sharpness. |
| Remove Noise | Removes single stray pixels from the image. |
| Solarization | Mimics the effect of exposing the image to too much light. |
| Aging | Applies a brown/sepia tint to make the image look old. |
| Posterize | Reduces the number of colors to make it look like a poster. |
| Pop Art | Applies high-contrast, artistic colors. |
| Charcoal Sketch | Makes the image look like a pencil or charcoal drawing. |
| Relief | Creates a 3D embossed effect. |
| Mosaic | Groups pixels into rectangular blocks for a tiled look. |
3.4 Advanced Image Formatting
- Cropping: Using the Crop tool will help improve your visual focus on an object. You can choose to use either Keep Scale (proportions stay the same) or Keep Image Size (proportions change when cropping is applied).
- Resizing: This can be done using the green handles or by entering exact measurements using the Image Properties option.
- Arrange: Arranges the position of the overlapping images (Send To Front/Send To Back).
- Align: Aligment will determine where your image will be positioned (Left, Right, Center, Top, Middle, Bottom).
- Anchoring: Anchoring the picture to either the Paragraph, Character or Page position.
- Wrapping: The wrapping will dictate the way text flows (Wrap Off, Page Wrap/Text Around/Through the Image).
[BOARD EXAM SCENARIO] Question: Rohan wants his image to stay exactly next to a specific paragraph, even if he adds more text above it. Which feature should he use? Answer: Rohan should use Anchoring. By anchoring the image to the paragraph, the image will move automatically whenever the paragraph moves.
3.5 Drawing Objects
- Drawing Tool: Upon selecting any shape (Rectangle, Ellipse, etc.), the mouse pointer turns into a cross pointer or plus pointer (+).
- Grouping: For moving a number of selected shapes together, click on the shapes together while holding the Shift key, then right-click and choose Group.
4. Chapter 3: Working with Templates
4.1 Definition of Templates
Template refers to an existing structure including sample content, theme, and style.
Important Distinction: The style dictates the formatting of a certain item such as a paragraph; a template is used to format the whole structure of a document.
4.2 Utilization of Preset Templates
Launch Template Manager from File > New > Templates or simply press Ctrl + Shift + N.
4.3 Creation of Templates and Working with Them
From a Document: Construct your document structure, then choose File > Templates > Save As Template.
Using Wizard: File > Wizards > [Letter/Fax/Agenda]. It is a tool that helps you create templates easily in steps.
As Default Template: Select any template from the Template Manager, then choose “Set as Default.” Every newly created document (Ctrl + N) will start with this template.
[BOARD EXAM SCENARIO] Q. The office assistant is required to prepare a “Monthly Sales Report” format every month. What does he need to do to make his job easier? Ans. Prepare the report format once only and save it as a Template. Just by opening the template each month, he will be all set.
5. Chapter 4: Table of Contents (ToC)
5.1 Understanding ToC
Table of Contents acts as an index in lengthy documents, where the headings are hyperlinked for quick browsing. The ToC in Writer is distinguished by its gray-colored background because it is an automatically created “field.”
5.2 Creating a ToC
Apply Styles for all headings in your document.
Navigate to Insert > Table of Contents and Index > Table of Contents, Index or Bibliography.
5.3 Formatting the ToC
The ToC dialog box contains five primary tabs:
| Tab Name | Purpose |
| Type | Set the Title and scope (entire document or chapter). |
| Entries | Define the structure using: LS (Link Start), E# (Chapter Number), E (Entry Text), T (Tab Stop), and LE (Link End). |
| Styles | Assign specific paragraph styles to different ToC levels. |
| Columns | Split the ToC into multiple columns (like a magazine index). |
| Background | Add colors or graphic textures behind the ToC. |
5.4 Managing the Table of Contents
The writer will not update your table of contents automatically when you edit your heading. Right-click the ToC then choose Update Index. To delete your index, click Delete Index.
6. Exam Tips & Summary
Essential Shortcut Keys
| Function | Shortcut Key |
| Styles and Formatting Pane | F11 |
| Manage/Open Templates | Ctrl + Shift + N |
| New Document (Blank) | Ctrl + N |
| Paste from Clipboard | Ctrl + V |
Final Booster Tips
In order to get your 100/100 score, don’t forget about the “under the hood” facts. When asked how to build a ToC, never answer by saying “click insert.” Always give the full description: Insert > Table of Contents and Index > Table of Contents, Index or Bibliography.